
The odds are stacked against the IT team, who are at work daily to protect their organization against cyberattacks. It will make life easier for the security teams if they get clarity on the vulnerabilities of their IT environment. For instance, the name of the vulnerability, the associated CVE ID, and the exact location on which the vulnerability resides.
However, IT teams need proof of why these vulnerabilities were detected as vulnerable, and the reasons need to be represented in an insightful way for them to comprehend and act.
The Proof of Detection feature in SanerNow does just that. It offers deeper insights into vulnerabilities and misconfigurations, including clarifying where they are located and why they were detected as vulnerable on the devices. The feature clearly represents the vulnerability detection summary for easier understanding of vulnerabilities and misconfigurations with obvious evidence.
This evidence helps IT teams know the nature of vulnerabilities and misconfigurations and prioritize remediation efforts to reduce the attack surface. They will be able to accurately prioritize vulnerabilities based on risk and contextualize the severity of the vulnerability.
Let’s see the Proof of Evidence in action.
Viewing Proof of Evidence for Vulnerabilities Detected on Devices
SanerNow’s Proof of Evidence feature provides you with a crystal clear view of the vulnerabilities found on your devices.
On the Individual Device page, SanerNow lists the vulnerabilities and misconfigurations detected on the device.
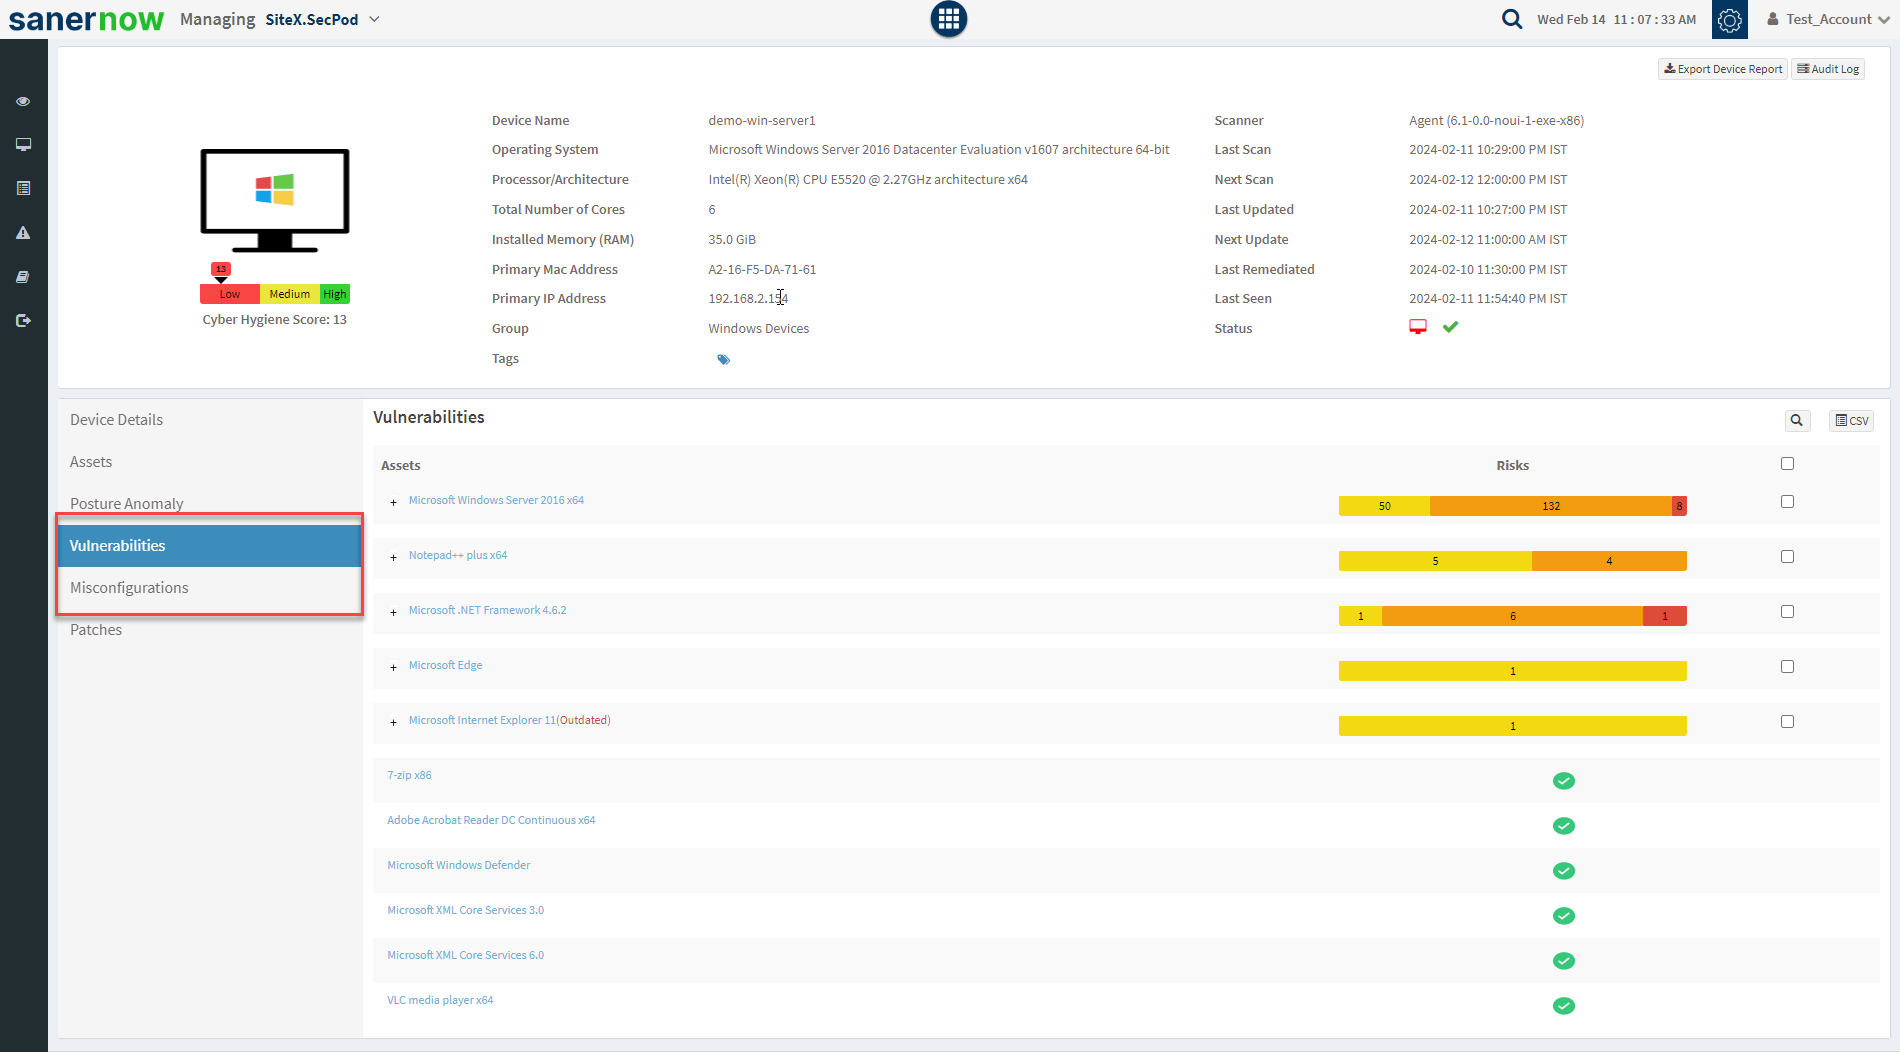
Click the + symbol to view the vulnerabilities detected in the Asset listed on the right side of the page.
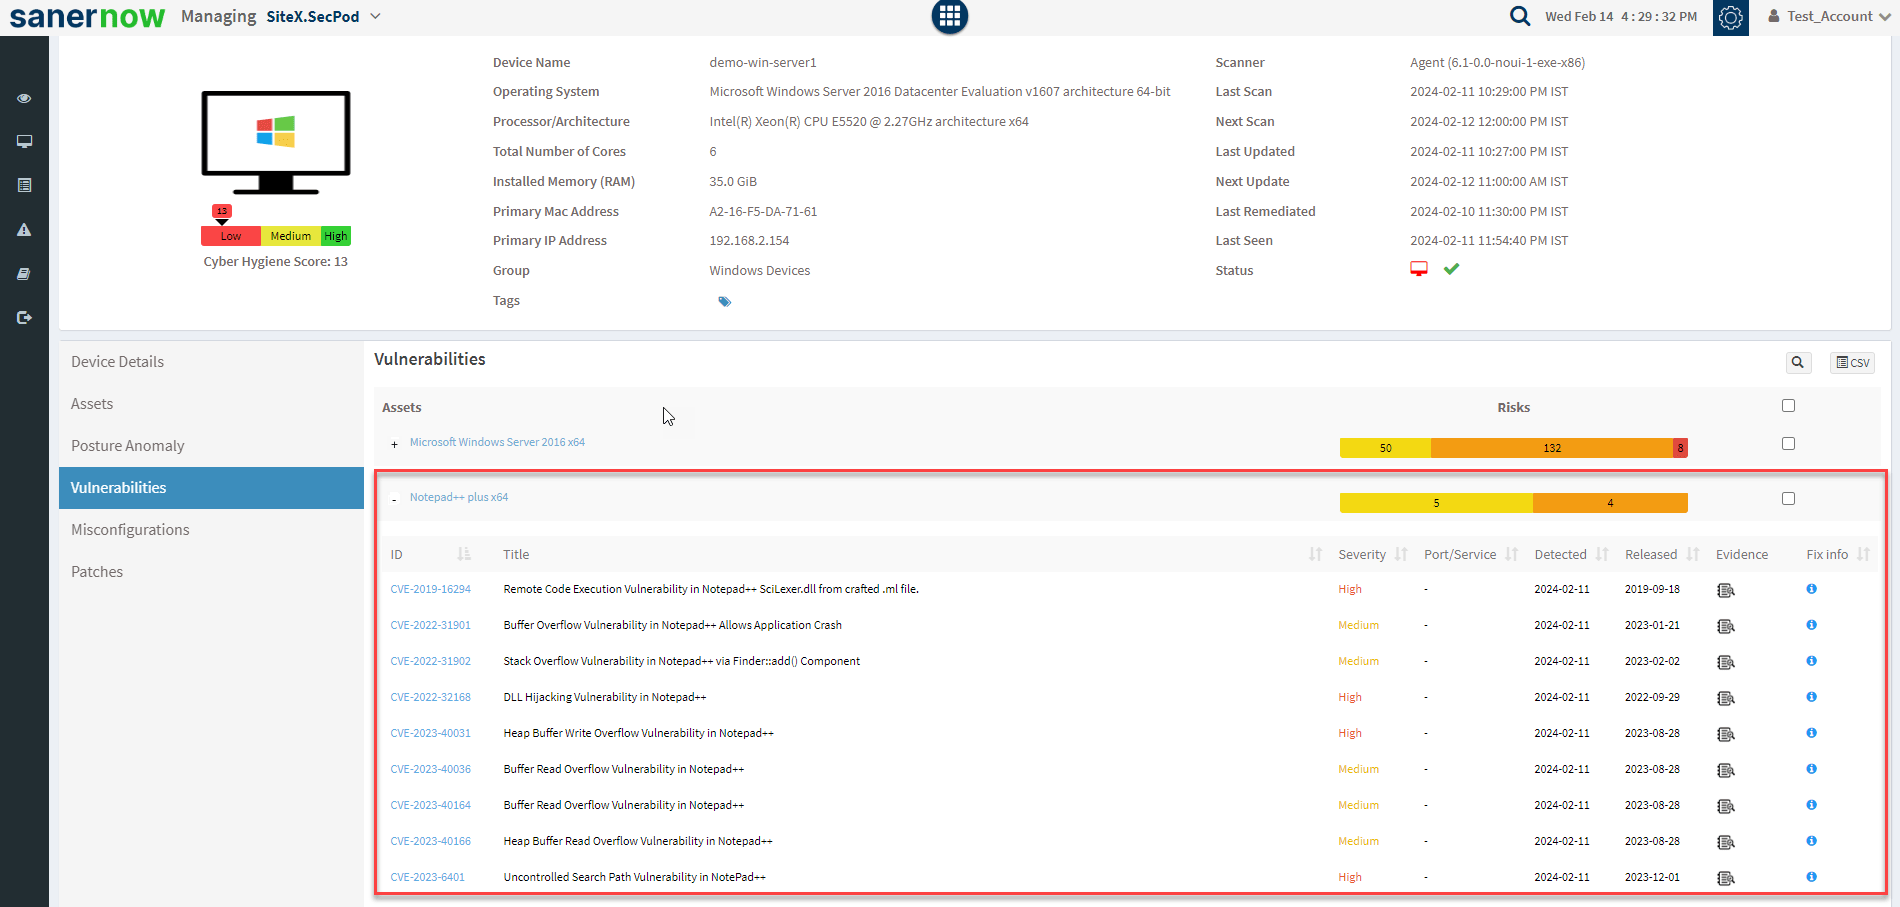
Click the ![]() icon to view the Proof of Evidence for the vulnerability identified. A pop-up window containing all the evidence information for the selected vulnerability appears.
icon to view the Proof of Evidence for the vulnerability identified. A pop-up window containing all the evidence information for the selected vulnerability appears.
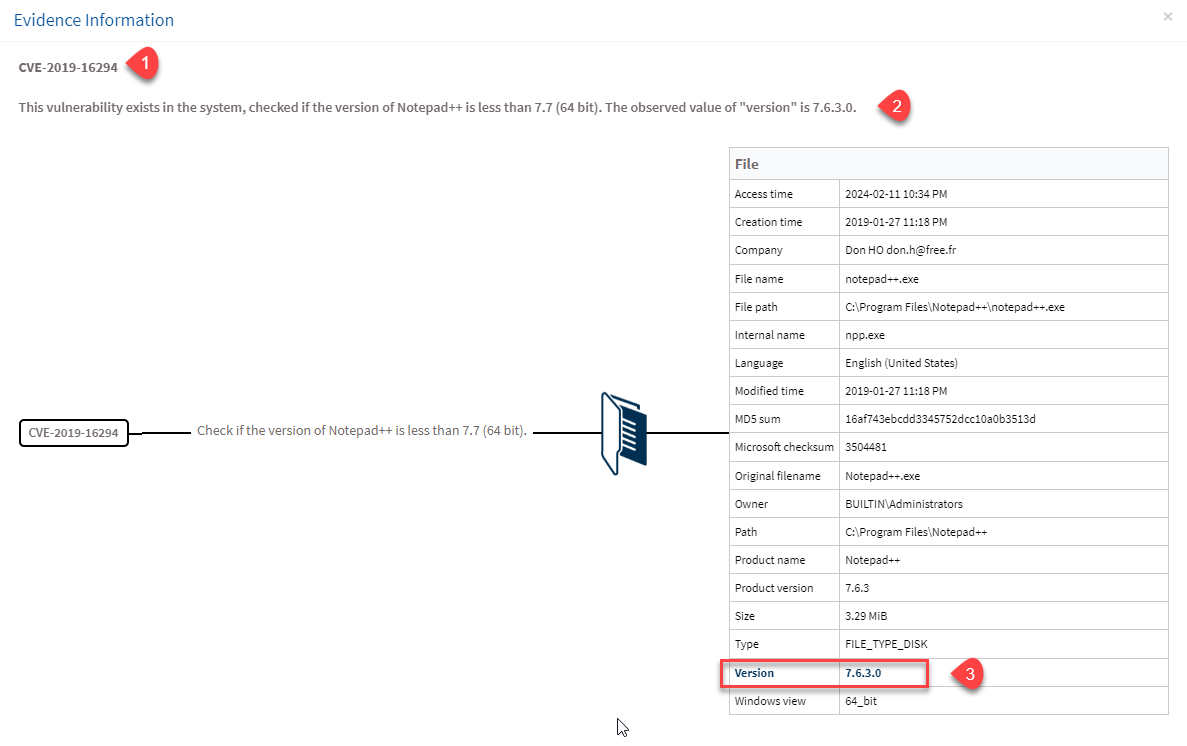
The pop-up window contains the following information:
- The CVE-ID associated with the vulnerability found on the device.
- The description of the check(s) SanerNow performed to find the evidence for the detected vulnerability. Here, you can find the actual value SanerNow found versus the expected value.
- The table on the right side of the page provides detailed information about the checks performed. Here, you need to focus on the information presented in bold.
Viewing Proof of Evidence for Misconfigurations Detected on Devices
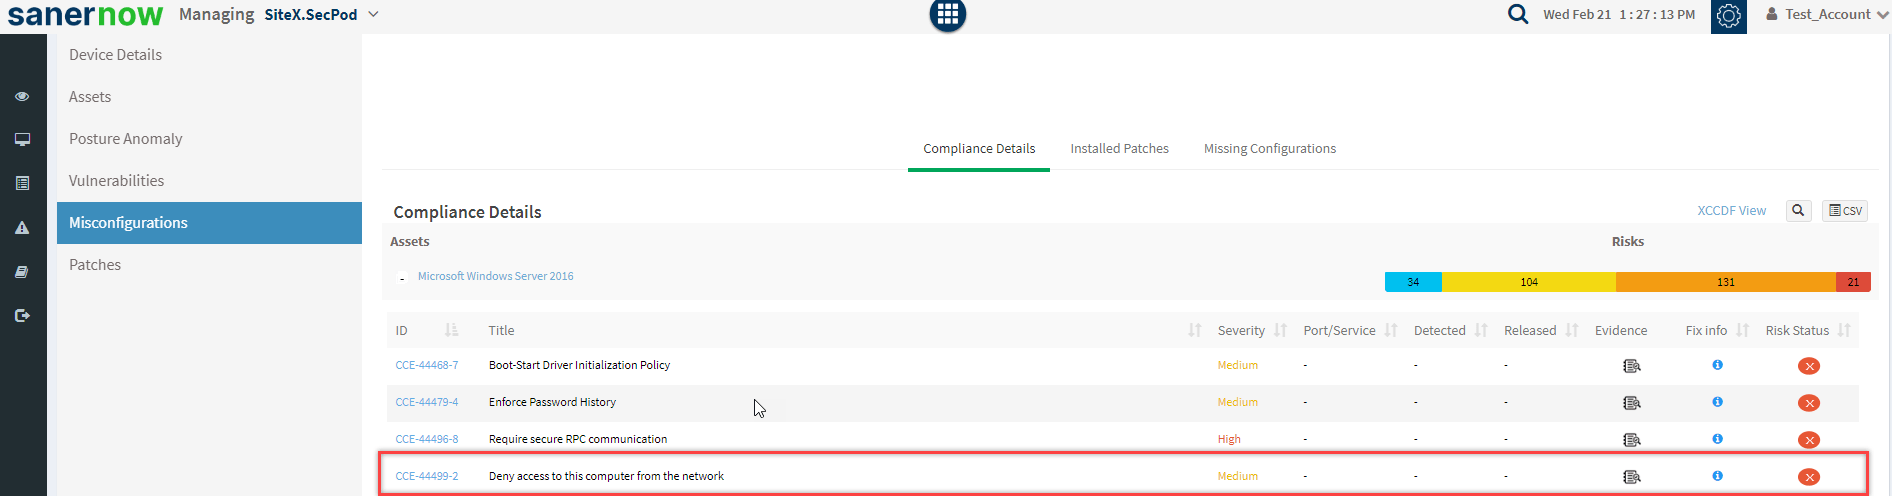
Access the Individual Device page in SanerNow and select the device for which you want to find the Proof of Evidence for detected misconfigurations.
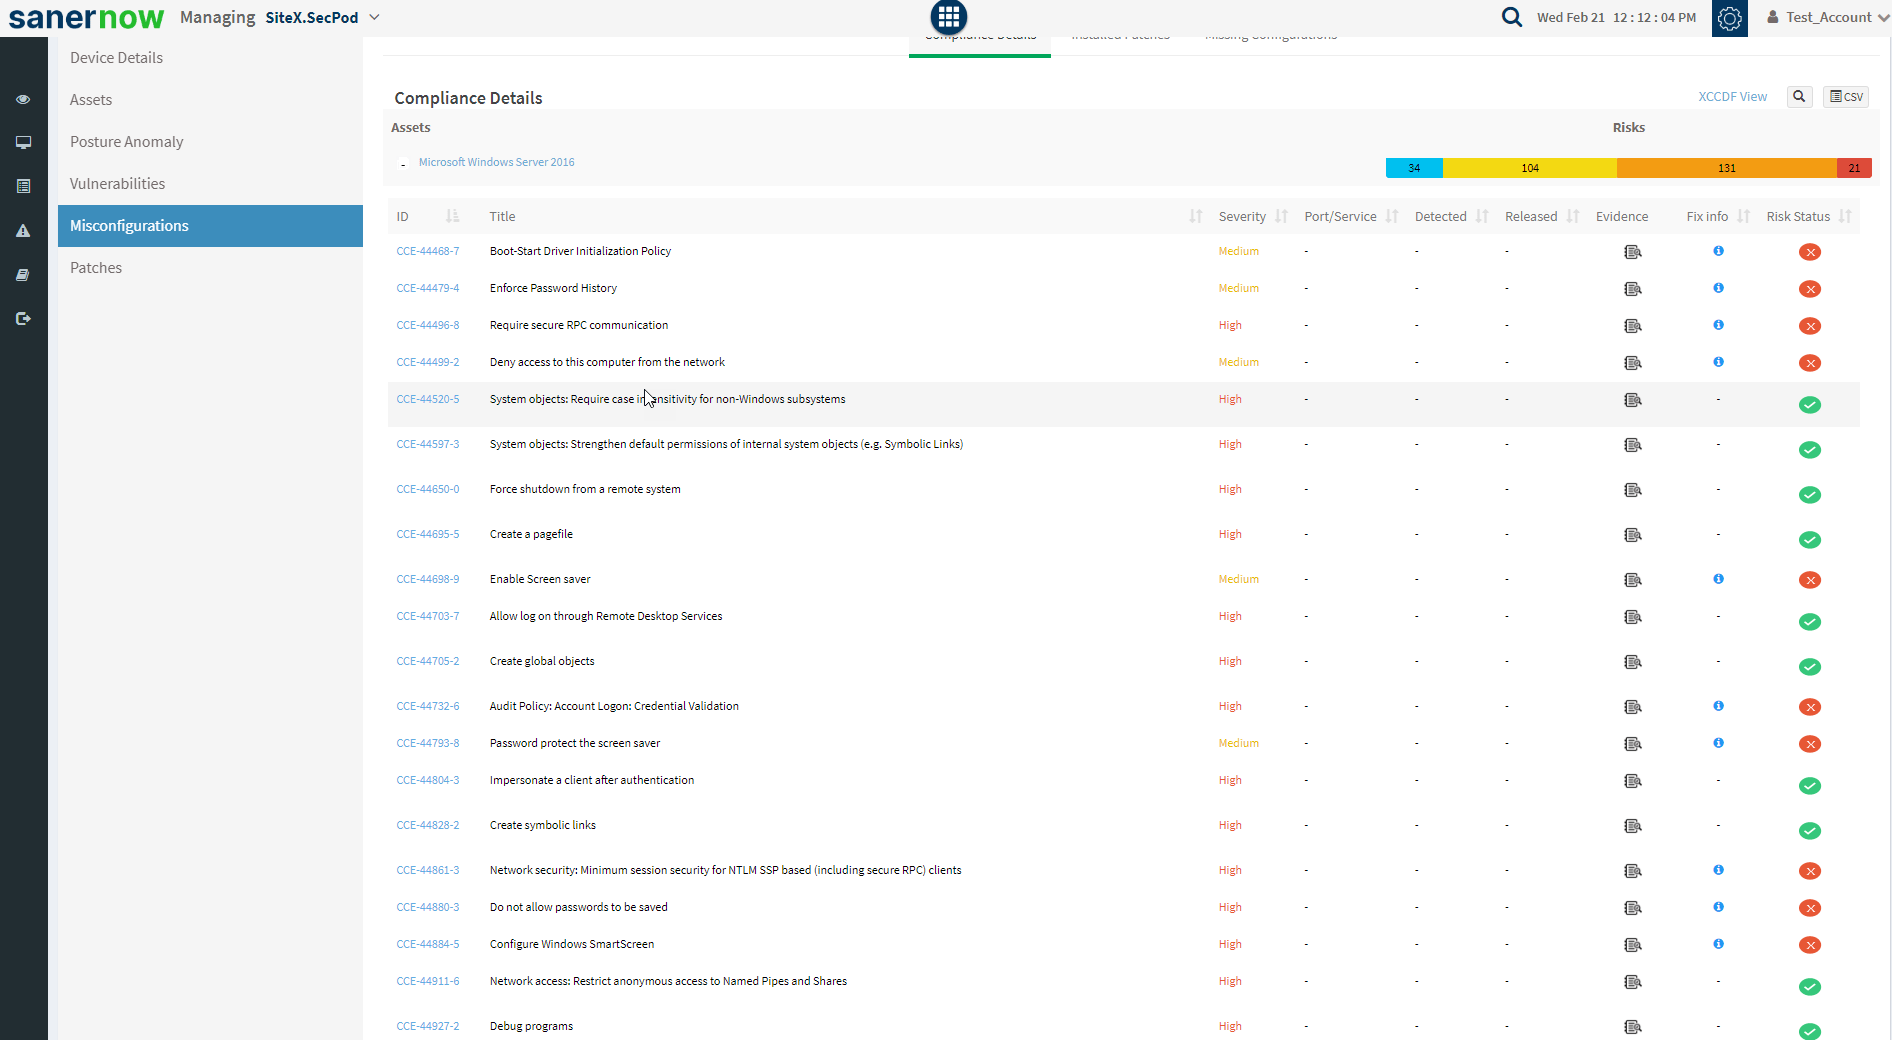
If you see an ![]() icon under the Risk Status column, it indicates a misconfiguration exists for the selected asset, and you need to take action to fix it. However, suppose you see a
icon under the Risk Status column, it indicates a misconfiguration exists for the selected asset, and you need to take action to fix it. However, suppose you see a ![]() icon under the Risk Status column. In that case, it indicates that the misconfiguration for the selected asset has been taken care of, and no further action is needed.
icon under the Risk Status column. In that case, it indicates that the misconfiguration for the selected asset has been taken care of, and no further action is needed.
SanerNow Proof of Evidence provides evidence for both compliant and non-compliant risks.
Non-Compliant Risk
Click the icon to view the Proof of Evidence for the misconfiguration identified.
A pop-up window containing all the evidence information for the selected misconfiguration appears.
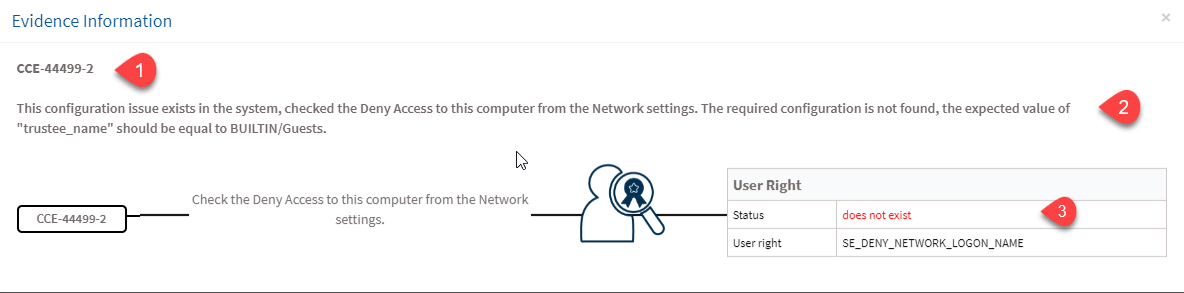
The pop-up window contains the following information:
- The CCE-ID associated with the misconfiguration found on the asset.
- The description of the check(s) SanerNow performed to find the evidence for the detected misconfiguration. Here, you can find the actual value SanerNow found versus the expected value.
- The table on the right side of the page provides detailed information about the check performed. Here, you need to focus on the information in bold or red font.
Compliant Risk
Click the icon to view the Proof of Evidence for the misconfiguration identified.
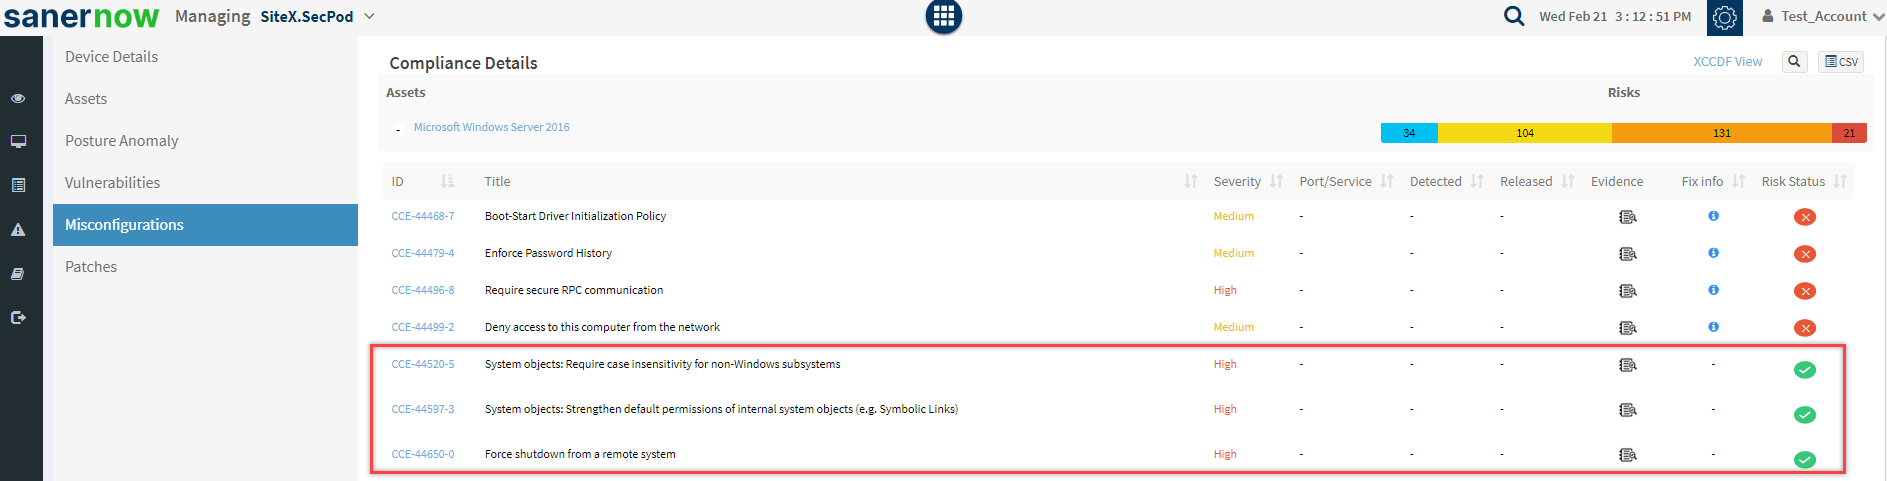
A pop-up window containing all the evidence information for the selected misconfiguration appears.
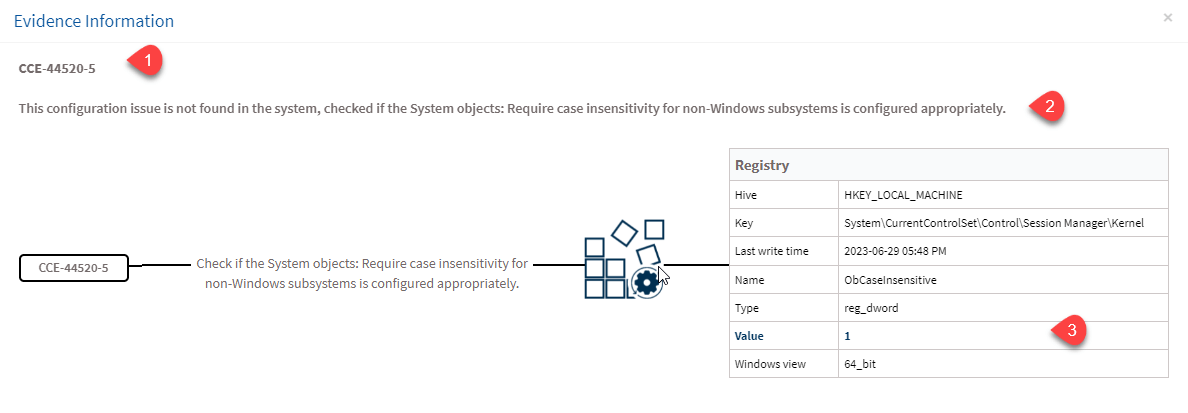
The pop-up window contains the following information:
- The CCE-ID associated with the misconfiguration found on the asset.
- The description of the check(s) SanerNow performed to find the evidence for the detected misconfiguration. Here, you can find the actual value SanerNow found versus the expected value.
- The table on the right side of the page provides detailed information about the checks performed. Here, you need to focus on the information in bold.
Schedule a Demo Right Away
We bet you found the Proof of Evidence feature quite compelling. Why not try it yourself? If you are a new customer, please email us at [email protected] to schedule a demo, and we will contact you.
Existing customers, please log in to your SanerNow web console to try the new Proof of Evidence feature. If you have any questions, please email [email protected] for any queries.